Now that we’ve seen what Eiger Simulation is, what do we do with our part once it’s simulated?
In this article, we’ll walk step by step through how to use simulation to optimize a design before even performing the first physical tests. Just like in Part 1, we’ll rely on a concrete example.
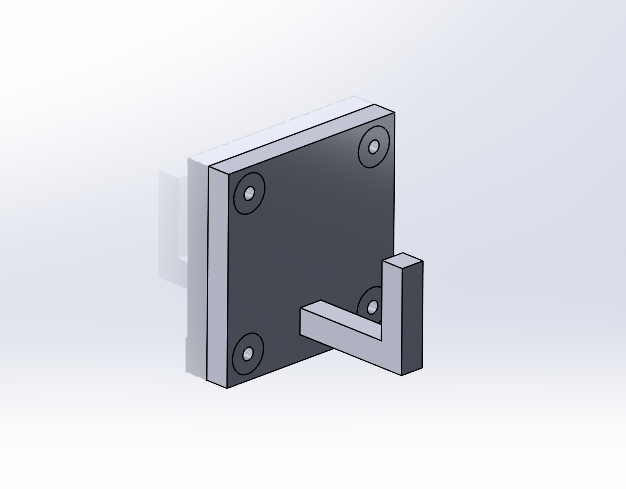
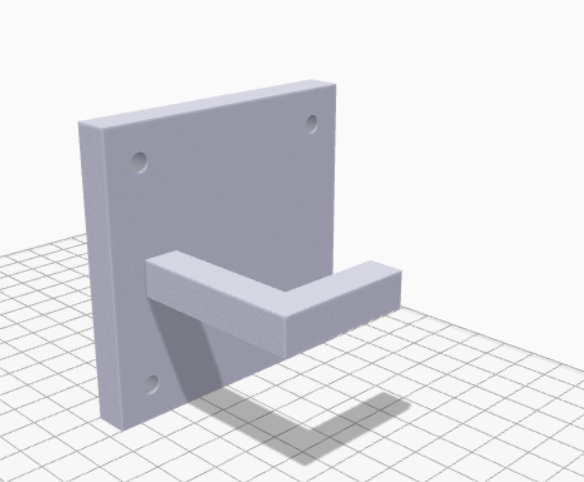
Here, we’ve modeled a hook that must withstand a 40 N load with a safety factor of 2.5.
1. Initial Analysis
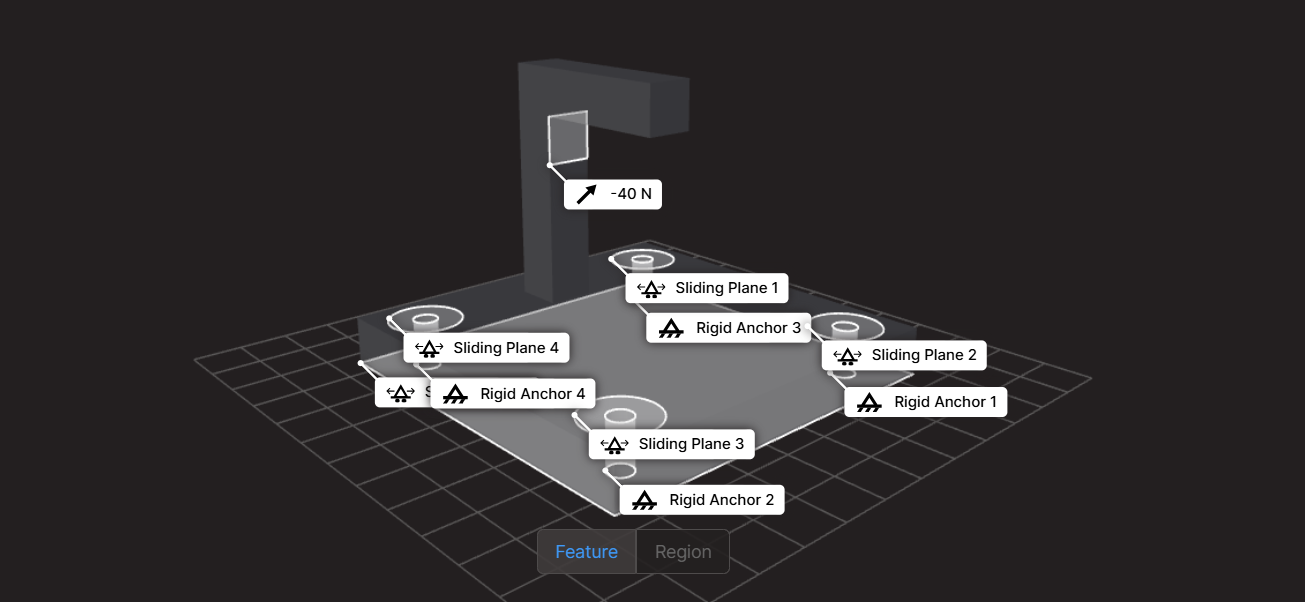
Once the part is imported into Eiger, we set the load case and run the simulation.
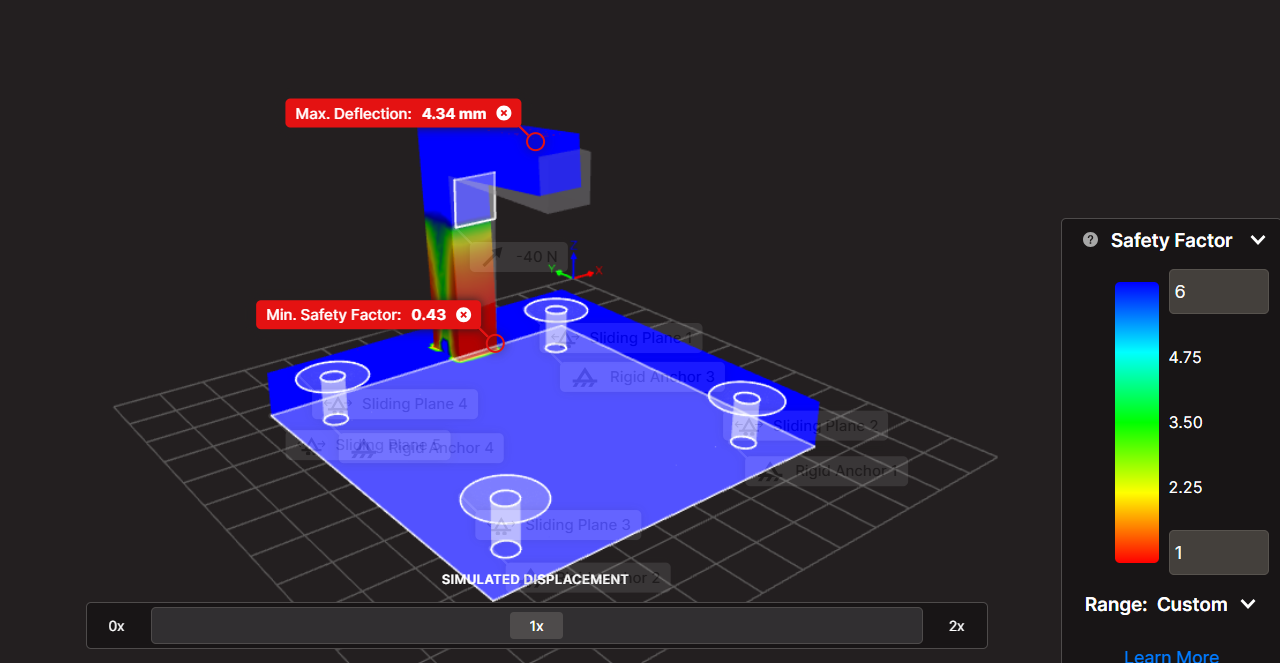
Result: our part is expected to fail with a safety factor of 0.43. It clearly needs reinforcement.
2. Orientation
Is my part oriented in the most effective way for my application?
Keep in mind that a 3D printed part is generally weaker in the Z direction. Printed layers are more prone to delaminating than tearing.
In our case, the hook is subjected to bending in the Y direction around the X axis. The maximum stress is therefore normal to the XY plane, along the Z axis, the weakest direction. Let’s try reorienting the part.
After running a new simulation:
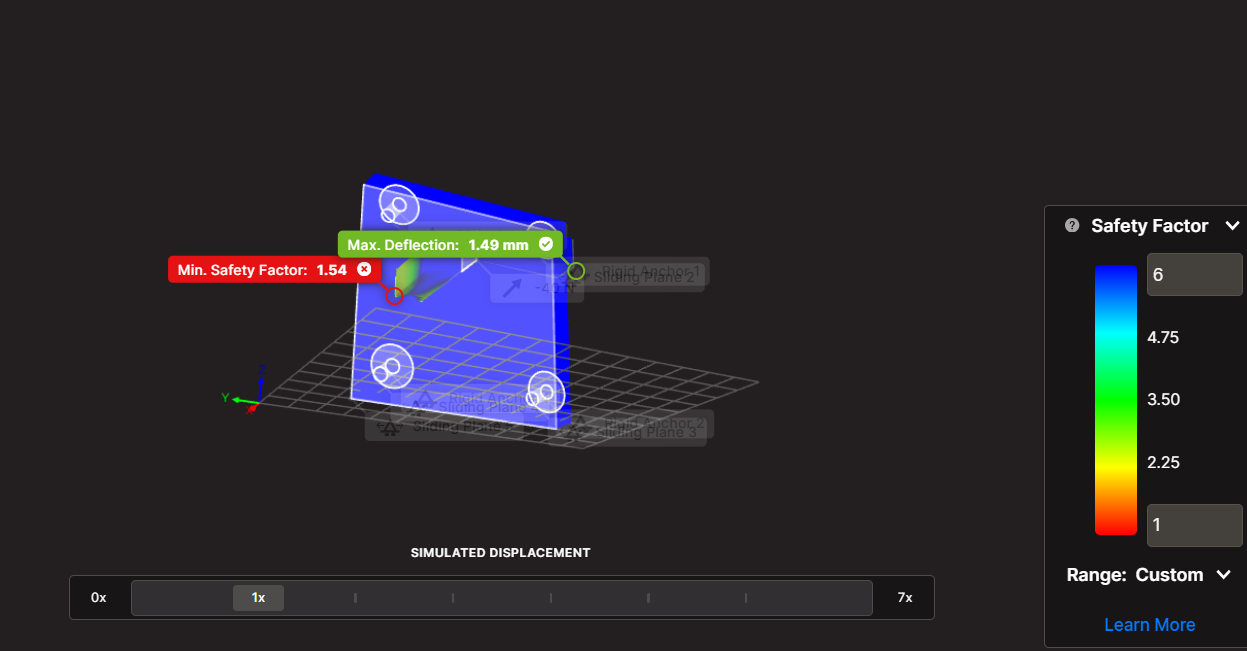
The safety factor jumps from 0.43 to 1.49. Reorienting the part made it more than three times stronger.
However, we’re still below our target of 2.5, so we need deeper refinement.
3. Design Improvements
Can the design be improved?
In general, a design can always be optimized depending on time and resources. To strengthen a part, one of the most effective approaches is to reduce stress concentrations and increase load-bearing surfaces.
For instance, adding fillets is a simple and efficient solution.
After exploring several configurations, we found an optimized version that preserves similar costs while increasing strength.
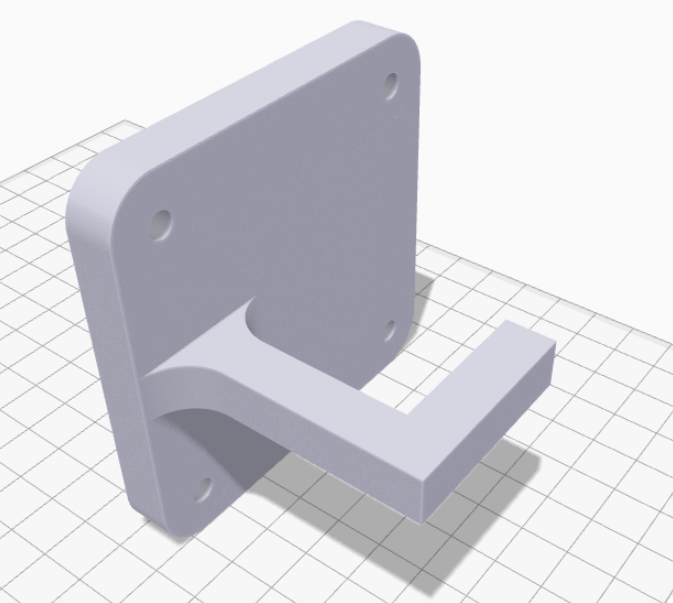
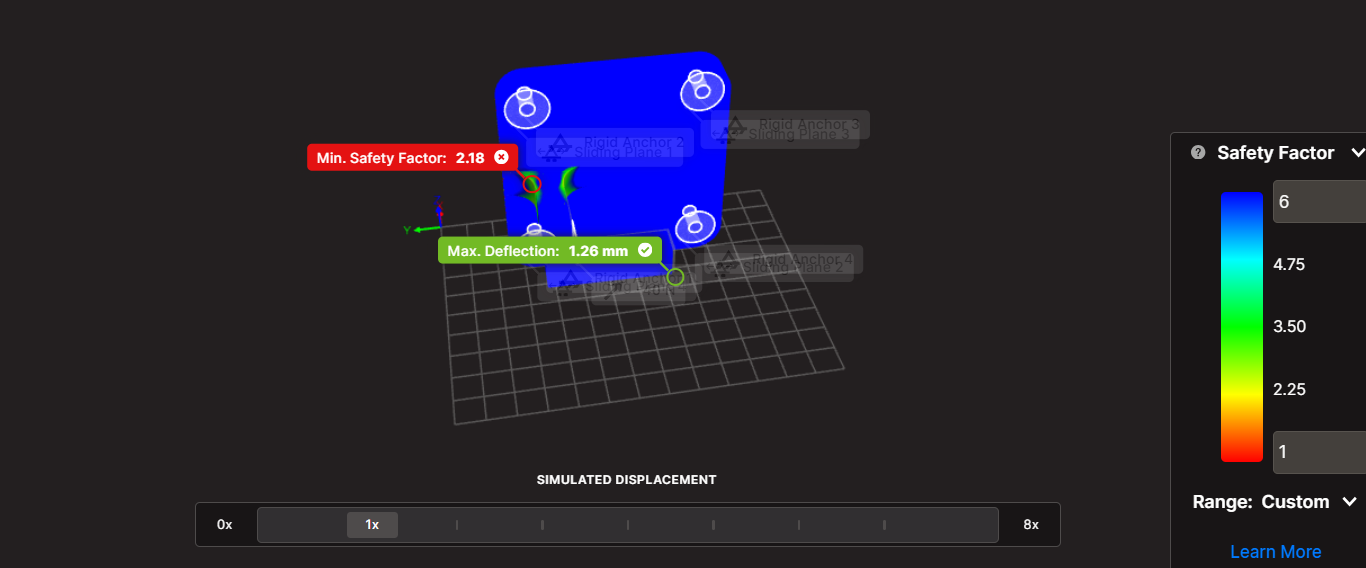
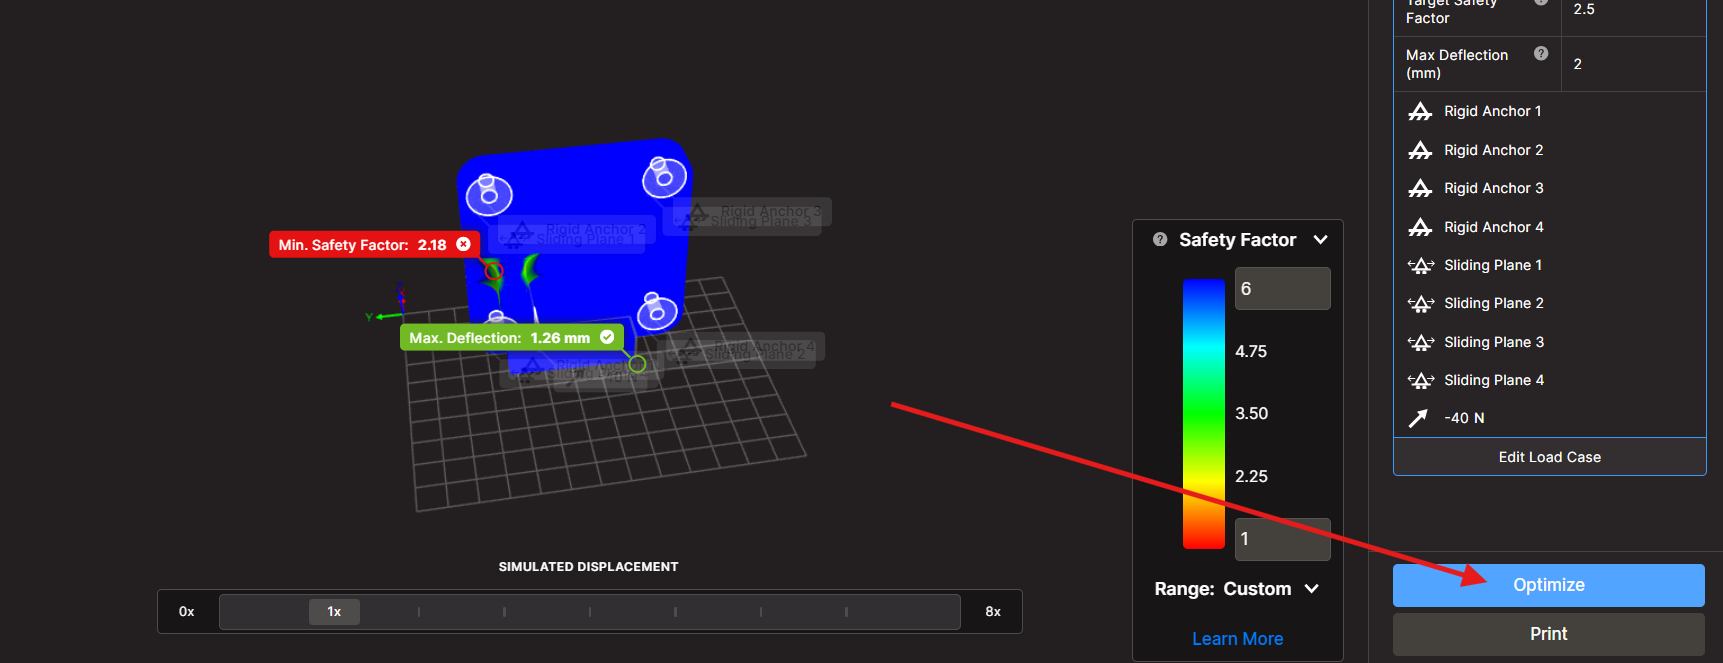
By adding basic fillets, we increased the safety factor by 46% (from 1.49 to 2.18) with no extra material cost, print time, or weight.
Still below our target of 2.5, time to push further with Eiger’s automatic optimization.
4. Optimization in Eiger
To launch optimization, simply select the corresponding option after running the simulation.
Eiger will test several configurations in the background, without using your local resources. Perfect moment for a coffee break while your part optimizes.
After some time, Eiger provides multiple configuration suggestions.
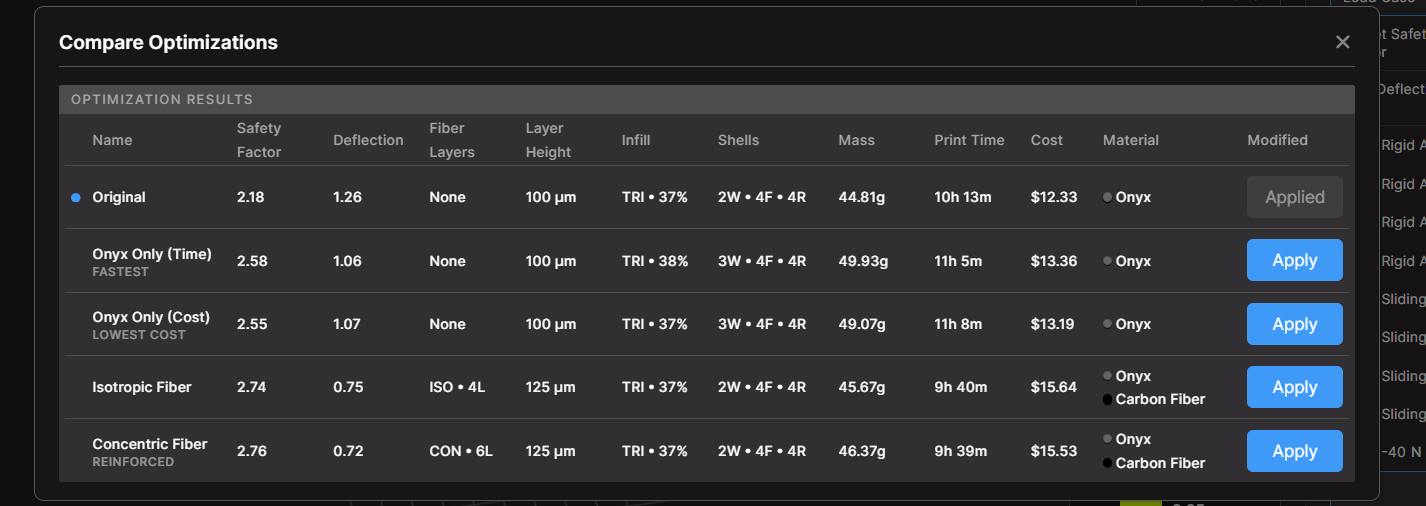
In our example, adding concentric carbon fiber increased the safety factor to 2.76, surpassing our 2.5 target, with about 30% higher cost.
There’s also the existence of an Onyx-only configuration reaches a safety factor of 2.55 for just 5% more cost.
Here’s the solution offered by Eiger:

The fiber-reinforced version shows fibers placed strategically around the highest-stress zones.
Optimized, Verified, and Ready to Print.
Without printing a single part, we already have a reliable understanding of how the hook will behave under load. We can now print it and test it under real conditions.
Thanks to Eiger’s simulation and optimization features, we save both time and material resources.
Want to know more about the Advanced Digital Forge plan, request a personalized demo, or have us optimize your parts? Contact our team, we’d be happy to help!